🍯 Homemade Soft Caramels – Buttery, Chewy, and Completely Irresistible!
🍬There’s something magical about unwrapping a square of golden caramel you made yourself. Soft, buttery, and just the right amount of chewy, these Homemade Caramels are proof that simple ingredients can create pure joy. Whether you’re stirring a pot on a cozy afternoon or gifting a batch wrapped in wax paper, these little bites of sweetness are the definition of homemade love.
Why You’ll Love These Caramels ❤️
- ✨ Perfect texture: Soft enough to melt on your tongue, yet firm enough to wrap.
- 🧈 Buttery flavor: Each bite bursts with rich, deep caramel and butter notes.
- 🥣 Foolproof process: Step-by-step guidance that anyone can follow — no candy-making fear here!
- 🎁 Gift-worthy: These caramels wrap beautifully and make thoughtful homemade gifts.
- 🍫 Customizable: Add sea salt, chocolate drizzle, or vanilla bean — make it your signature sweet.
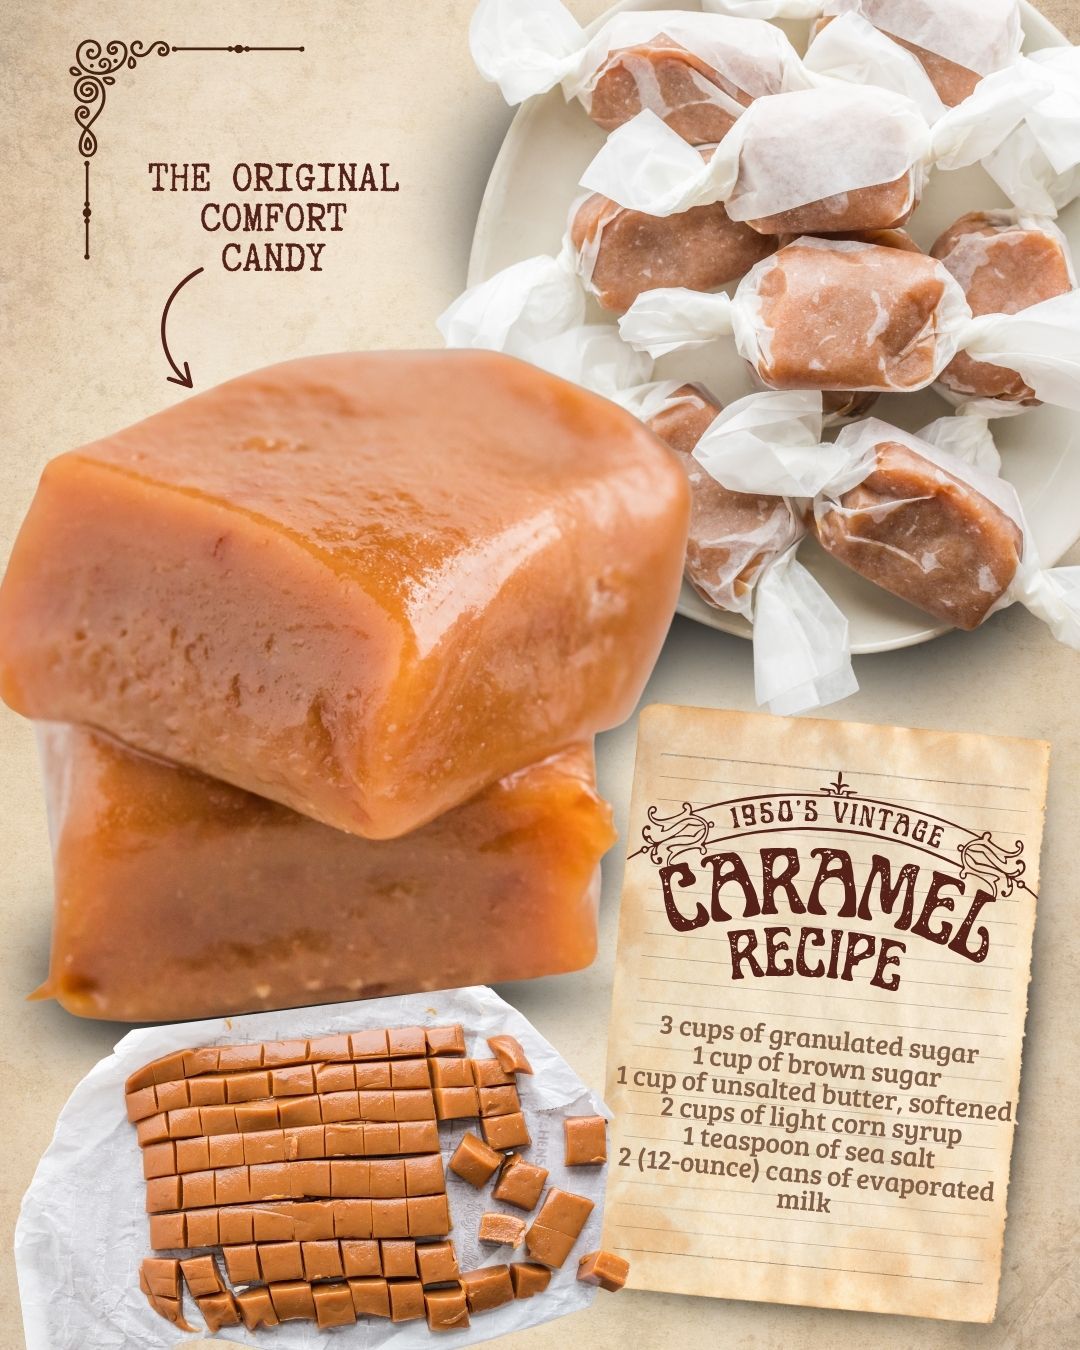
Ingredients You’ll Need 🧂
| Category | Ingredients |
|---|---|
| Base |
1 cup (2 sticks) unsalted butter 2 ¼ cups packed brown sugar 1 cup light corn syrup 1 can (14 oz) sweetened condensed milk 1 tsp pure vanilla extract ½ tsp fine sea salt |
| Optional Flavor Add-Ins |
1 tsp flaky sea salt (for salted caramels) 1 tbsp bourbon or rum (for adults 🎩) ½ tsp cinnamon or espresso powder Melted chocolate for drizzling |
Equipment Needed 🍯
- Heavy-bottomed saucepan (3-quart or larger)
- Candy thermometer (crucial for accuracy)
- Heatproof spatula or wooden spoon
- 8×8-inch or 9×9-inch baking pan
- Parchment paper
- Sharp knife for cutting squares
Step-by-Step: How to Make Homemade Caramels 🍬
- Prepare your pan: Line a square baking pan with parchment paper, leaving an overhang on the sides for easy lifting later. Lightly butter the parchment for extra non-stick security.
- Melt the butter: In a heavy saucepan over medium heat, melt butter completely. Once melted, add the brown sugar, corn syrup, and sweetened condensed milk. Stir constantly with a heatproof spatula.
- Bring to a boil: Increase heat slightly and continue stirring as the mixture bubbles. Clip on your candy thermometer and keep an eye on the temperature — patience is key!
- Cook to “soft ball” stage: Once the mixture reaches 240°F (115°C), remove it from heat. This ensures a soft, chewy texture. Overcooking makes it hard, so stay alert! ⏱️
- Flavor it up: Stir in vanilla extract and sea salt. For a fun twist, add your chosen flavor add-ins now — cinnamon, espresso, or a splash of bourbon all work beautifully.
- Pour and cool: Carefully pour the molten caramel into your prepared pan. Let it rest, uncovered, at room temperature until firm — about 2–3 hours.
- Cut into squares: Lift the caramel slab using the parchment, place on a cutting board, and slice into even squares or rectangles using a buttered knife.
- Wrap and store: Wrap each piece in wax paper or cellophane and twist the ends. They’ll look just like candy-shop treats!
Texture Guide 🧈
| Temperature | Stage | Texture |
|---|---|---|
| 230°F / 110°C | Thread | Very soft, syrupy |
| 240°F / 115°C | Soft Ball | Soft & chewy (perfect) |
| 245°F / 118°C | Medium Ball | Firmer, like store-bought |
| 250°F / 121°C | Hard Ball | Harder texture, brittle edge |
Flavor Variations 🍫
- Salted Caramel: Sprinkle sea salt flakes immediately after pouring into the pan.
- Vanilla Bean Caramel: Stir in scraped vanilla bean seeds for a speckled, aromatic finish.
- Chocolate Dipped: Once cooled and cut, dip half of each square in melted dark chocolate.
- Spiced Maple: Swap ¼ cup corn syrup for maple syrup and add a pinch of cinnamon.
- Espresso Buzz: Add ½ tsp espresso powder with the vanilla for a mocha-caramel flavor.
Storage & Shelf Life 🧊
- Store wrapped caramels in an airtight container at room temperature for up to 3 weeks.
- In warm climates, refrigerate to prevent sticking (bring to room temp before eating).
- Caramels can be frozen up to 3 months — wrap tightly in plastic and seal in a freezer bag.
Gifting Ideas 🎁
These homemade caramels make charming edible gifts! Fill a glass jar or tin, add a ribbon, and attach a handwritten tag. Pair with cocoa mix for winter holidays or wrap individually for party favors. Everyone loves a gift that melts hearts — and these will.
FAQ — Homemade Caramels 🍬
1. Do I really need a candy thermometer?
Yes! It ensures accuracy — even a few degrees can shift your caramel from chewy to brittle. It’s the best small investment for perfect texture every time.
2. Can I double the recipe?
Absolutely. Use a larger pot (at least 4-quart) to prevent boil-over, and increase cooking time slightly. Watch your thermometer, not the clock!
3. My caramels are too hard — what happened?
They were cooked past 245°F. Next time, remove from heat a little earlier (240°F). Humidity and pan thickness can also affect results.
4. Can I use white sugar instead of brown?
Yes, but brown sugar gives deeper flavor and softer texture. White sugar yields paler, firmer caramels.
5. How do I clean the sticky pan?
Fill it with water, bring to a boil, and the caramel dissolves right off — no scrubbing required!
Nutrition (per piece)
| Nutrient | Amount |
|---|---|
| Calories | 90 kcal |
| Fat | 5 g |
| Carbohydrates | 11 g |
| Protein | 0.4 g |
| Sodium | 45 mg |
Serving Ideas 🍮
- Sprinkle chopped caramels over warm brownies or apple crisp.
- Melt a few into your morning latte for a sweet caramel macchiato vibe ☕.
- Fold into cookie dough or swirl through ice cream before freezing.
Final Thoughts ✨
Making Homemade Caramels might seem intimidating, but once you try it, you’ll realize how wonderfully simple and rewarding it is. With a few pantry staples, a little patience, and that moment you reach perfect “soft-ball” temperature, you’ll create buttery squares of happiness. Every unwrap, every bite, every “wow” from someone tasting one — that’s your reward. 💛
Discover more sweet creations on Cuisinere 🍯