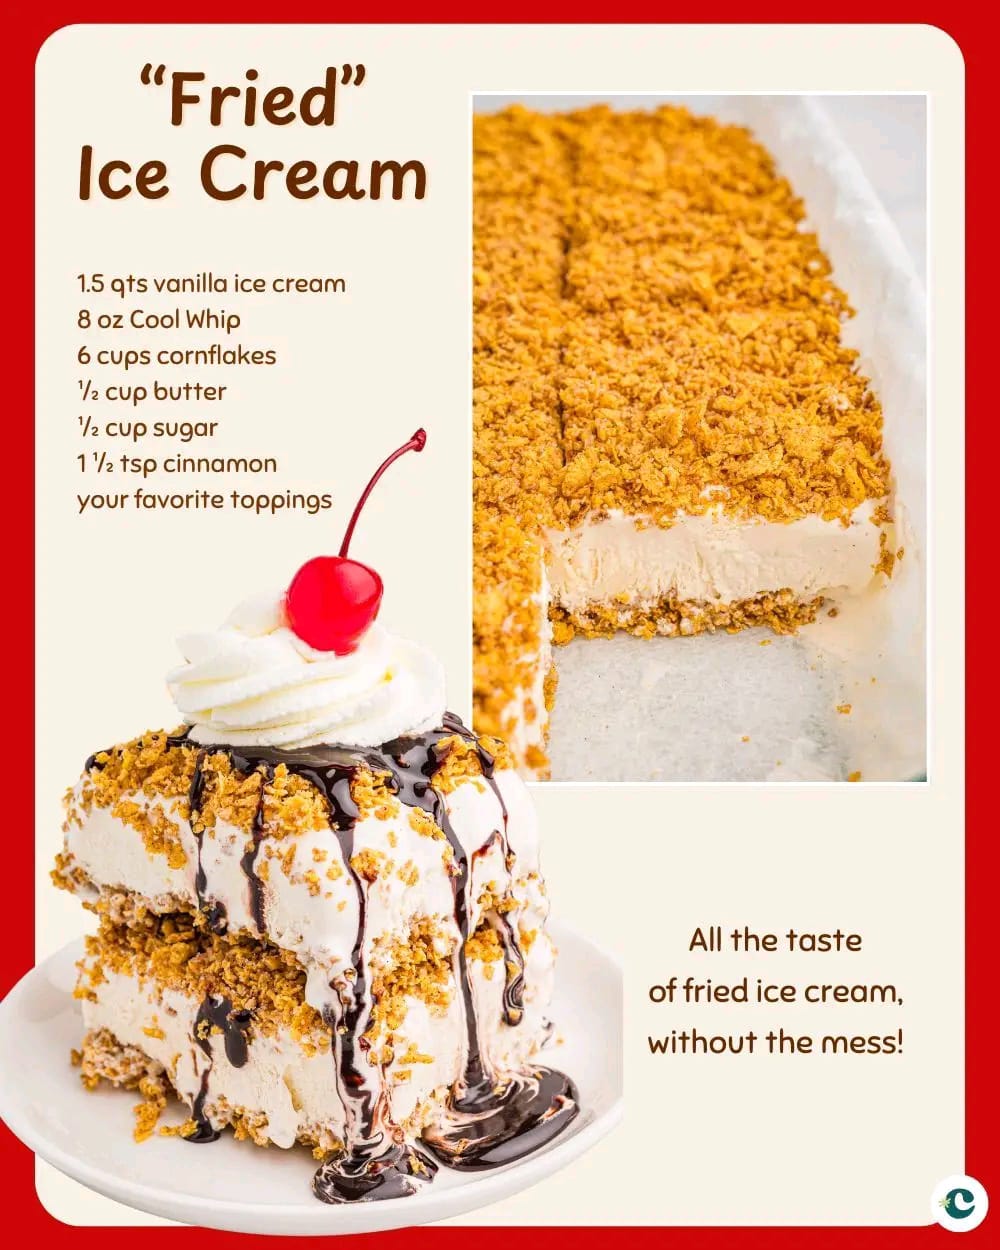
Craving that irresistible crunch of fried ice cream—without dealing with hot oil or a deep fryer? You’re in the right place. This easy, no-fry version of “fried” ice cream gives you all the crispy, creamy goodness you love… without the mess.
Whether you’re looking to impress guests or just treat yourself, this recipe delivers indulgence in every spoonful. And yes, it’s just as magical as it sounds.
Table of Contents
💡 What Is “Fried” Ice Cream?
Traditionally, fried ice cream is a scoop of ice cream rolled in a crispy coating and quickly deep-fried to create a hot-and-cold dessert masterpiece.
But in this no-fry version, you’ll get that same crunchy texture and rich flavor using your oven or stovetop—no oil splatters or stress required.
This recipe is safer, easier, and totally beginner-friendly—perfect if you want all the wow with none of the worry.
🛒 Ingredients for “Fried” Ice Cream
Here’s what you’ll need to whip up your own crispy-coated scoops at home:
| Ingredient | Amount |
|---|---|
| Vanilla ice cream | 1 pint (or more) |
| Crushed cornflakes | 2 cups |
| Unsalted butter | 1/2 cup |
| Sugar | 2 tablespoons |
| Ground cinnamon | 1 tsp |
| Honey or chocolate sauce | For drizzling |
| Whipped cream (optional) | For topping |
| Maraschino cherries | Optional garnish |
👩🍳 How to Make “Fried” Ice Cream (Step-by-Step)
1. Scoop and Freeze
Scoop balls of vanilla ice cream (about ½ cup each), place them on a baking sheet lined with parchment, and freeze for at least 1 hour, or until firm.
2. Toast the Coating
In a skillet over medium heat, melt butter and stir in the crushed cornflakes, sugar, and cinnamon. Cook for about 5 minutes, stirring constantly until golden and fragrant.
✅ Tip: Let the coating cool completely before rolling your ice cream in it.
3. Roll and Refreeze
Roll the frozen scoops in the toasted coating until fully covered. Return to the freezer for another 30 minutes to firm up.
4. Serve and Dress It Up
Drizzle with honey or chocolate sauce, top with whipped cream and a cherry, and enjoy your crunchy, creamy creation.
💬 Why You’ll Love This “Fried” Ice Cream
- No deep fryer or hot oil required
- Perfectly crispy without the mess
- Quick and simple for any skill level
- Easy to customize with flavors and toppings
- Crowd-pleaser for kids and adults alike
🍨 Flavor Variations to Try
Want to switch it up? Here are a few tasty twists:
- Chocolate “Fried” Ice Cream: Use chocolate ice cream and drizzle with hot fudge
- Coconut Crunch: Add shredded coconut to the cornflake mix
- Spicy-Sweet Kick: Sprinkle a pinch of cayenne into the coating
- Caramel Dream: Use dulce de leche ice cream and top with caramel sauce
❓ FAQ: “Fried” Ice Cream
Can I use other cereals besides cornflakes?
Absolutely! Try crushed Frosted Flakes, Rice Krispies, or even crushed graham crackers for a twist.
Does it really taste like fried ice cream?
You bet. The toasted coating gives you that same golden, crunchy shell—without deep frying.
Can I make it ahead of time?
Yes! Prepare the coated ice cream scoops and keep them frozen in an airtight container until you’re ready to serve.
What’s the best ice cream flavor to use?
Vanilla is classic, but cinnamon, caramel swirl, or even butter pecan taste amazing with the crunchy coating.
🧾 Nutritional Estimate (Per Serving)
- Calories: ~320
- Fat: ~18g
- Sugar: ~22g
- Protein: ~3g
(Values may vary based on toppings and portion sizes.)
🥄 Serving Tips & Party Ideas
- Make it a DIY dessert bar: Let guests roll their own scoops and choose toppings
- Add to a Mexican-themed dinner night for the perfect finale
- Serve in waffle bowls for extra crunch
- Try mini scoops for bite-sized treats at parties
🔥 Final Thoughts: Dessert That Delivers Crunch and Cream
You don’t need a deep fryer to enjoy that irresistible hot-cold, creamy-crunchy combo. This “fried” ice cream recipe delivers all the flavor with zero fear. It’s playful, satisfying, and totally addictive.

