If you’re looking for a dessert that’s as pretty as it is delicious, then Cherries in the Snow might just become your new favorite treat. Creamy, sweet, and topped with vibrant red cherries, this retro-style dessert has stood the test of time — and for good reason. Whether you’re planning a holiday table, a summer potluck, or just want to satisfy your sweet tooth, this easy no-bake recipe has you covered.
Table of Contents
❤️ Why You’ll Love Cherries in the Snow
You’re not just making another dessert — you’re creating a showstopper. It’s simple, it’s quick, and it feels a little fancy without any fuss.
Here’s why it works:
- No baking required – It’s a fridge dessert that keeps things cool and easy.
- Minimal ingredients – Most of what you need is already in your kitchen.
- Big visual impact – That cherry topping steals the show.
- Light texture – Creamy layers melt in your mouth without being heavy.
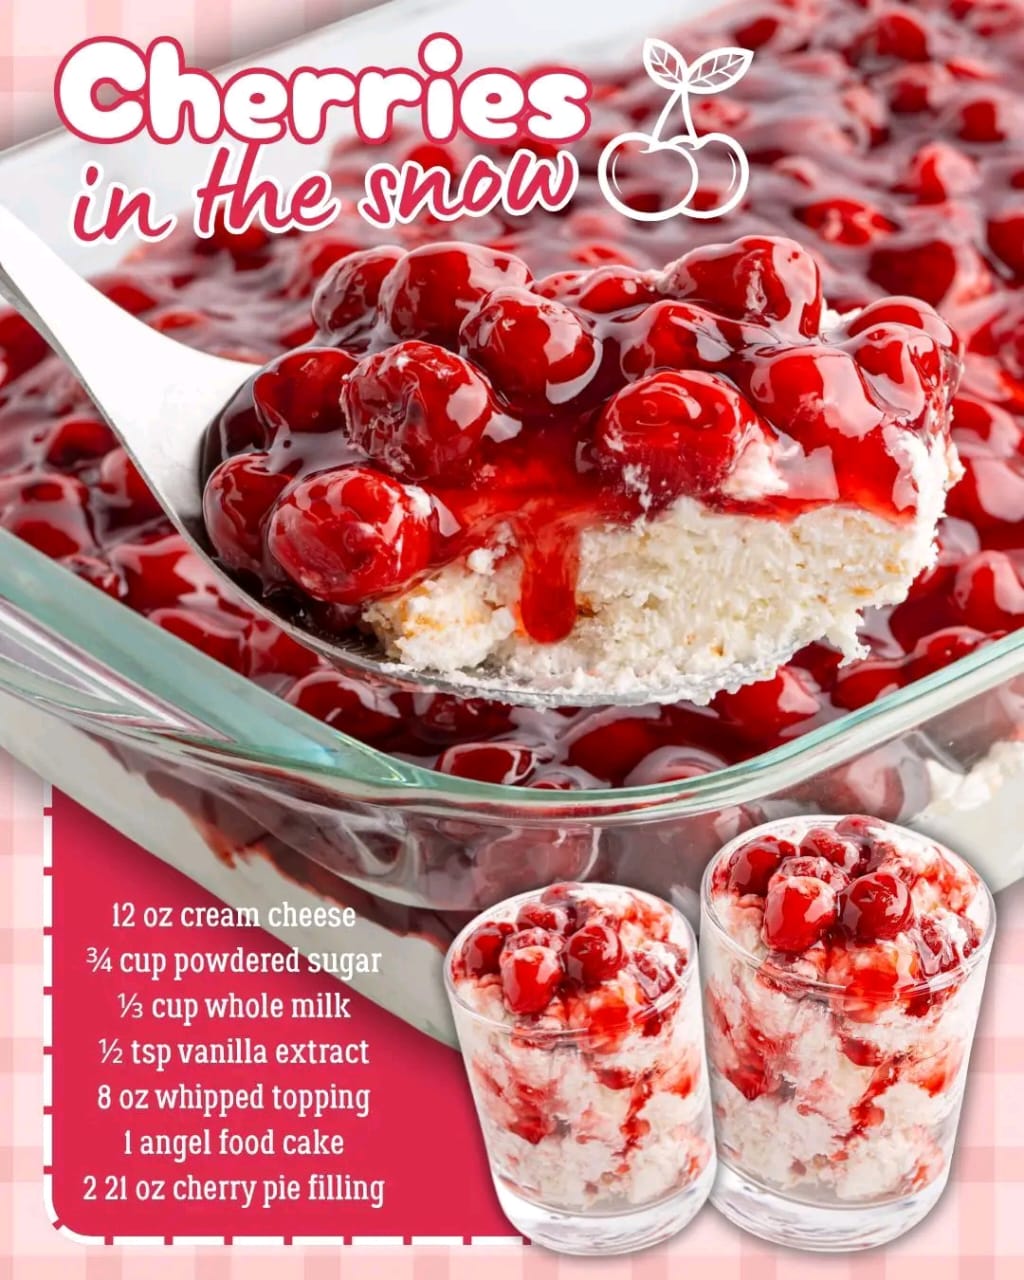
📝 Ingredients for Cherries in the Snow
Let’s get you prepped. Here’s everything you’ll need:
| Ingredient | Amount |
|---|---|
| Cream cheese (softened) | 8 oz |
| Granulated sugar | 1 cup |
| Whipped topping (like Cool Whip) | 8 oz |
| Angel food cake (cubed) | 1 pre-made cake or homemade |
| Cherry pie filling | 1 can (21 oz) |
| Vanilla extract (optional) | 1 tsp |
🛒 Tip: You can use pound cake or sponge cake as an alternative base.
👩🍳 How to Make Cherries in the Snow
This dessert comes together in just a few easy steps. Here’s how:
Step-by-Step Instructions:
- Prepare the Creamy Layer
In a large bowl, beat softened cream cheese and sugar together until smooth. Fold in the whipped topping and vanilla extract if using. - Layer the Cake Cubes
Place a layer of angel food cake cubes in a 9×13 dish or trifle bowl. - Spread the Cream Cheese Mixture
Spoon and spread half the creamy mixture over the cake cubes. - Repeat Layers
Add another layer of cake cubes and top with the remaining cream mixture. - Top with Cherry Pie Filling
Carefully spoon the cherry pie filling over the top, spreading it evenly. - Chill and Serve
Refrigerate for at least 2 hours before serving so everything sets nicely.
🍒 Variations You Can Try
Want to make it your own? You’ve got options:
- Low-sugar version: Use light whipped topping, reduced-fat cream cheese, and sugar-free cherry pie filling.
- Berry twist: Replace cherries with strawberry, blueberry, or raspberry pie filling.
- Crunchy add-in: Sprinkle crushed graham crackers or chopped nuts between layers.
- Mini cups: Serve in individual parfait cups for a party-friendly presentation.
📦 Make-Ahead & Storage Tips
- Make-Ahead: Best made a day in advance so the layers can chill and set.
- Storage: Keep covered in the fridge for up to 3 days.
- Freezing? Not recommended — the texture changes too much.
❓ Cherries in the Snow – FAQ
Can I make this with fresh cherries?
Yes, but you’ll want to cook them into a syrup first, similar to pie filling.
Is this the same as Cherry Delight?
They’re very similar — Cherry Delight uses a graham cracker crust instead of cake.
Can I use homemade whipped cream?
Absolutely! Just whip 1 cup heavy cream with 2 tbsp powdered sugar until stiff peaks form.
🎉 Serving Suggestions
- Serve after a holiday dinner with coffee or mulled wine.
- Add white chocolate shavings for a festive finish.
- Layer into mini mason jars for cute picnic-ready desserts.
🥄 One Bite and You’re Hooked
Cherries in the Snow isn’t just a dessert — it’s an experience. Light as air, sweet as a kiss, and stunning to look at. Whether you’re trying it for the first time or recreating a family favorite, you’re in for something special.
So go ahead — grab a spoon and take a dive into your own snowy cherry dream. ❄️🍒